If you’ve noticed water pooling behind your toilet or the sound of running water that never seems to stop, you’re probably dealing with a leaking toilet tank. Even a slow leak can waste gallons of water each day and raise your utility bill. The good news is that most toilet tank leaks are simple to diagnose and often easy to repair.
A leaking toilet tank usually points to one of a few key issues. Common culprits include a worn flapper, a faulty fill valve, loose tank bolts, or a cracked porcelain tank. Each of these parts plays a role in maintaining the right water level and sealing the tank properly. When one fails, water escapes where it shouldn’t—either into the bowl or onto your bathroom floor.
Understanding how your toilet tank works is the first step toward fixing the problem. The tank’s internal components—such as the flapper valve, flush valve, overflow tube, and gasket—control the flow and refill of water after each flush. If any of these parts wear down or shift out of place, you’ll see the telltale signs of a leak: constant refilling, hissing sounds, or moisture around the base.
This guide walks through the most common causes of a leaking toilet tank, how to identify the source of the leak, and which repairs you can handle yourself. For more serious issues like a cracked tank or recurring leaks, a licensed plumber can ensure your system is sealed tight and running efficiently.
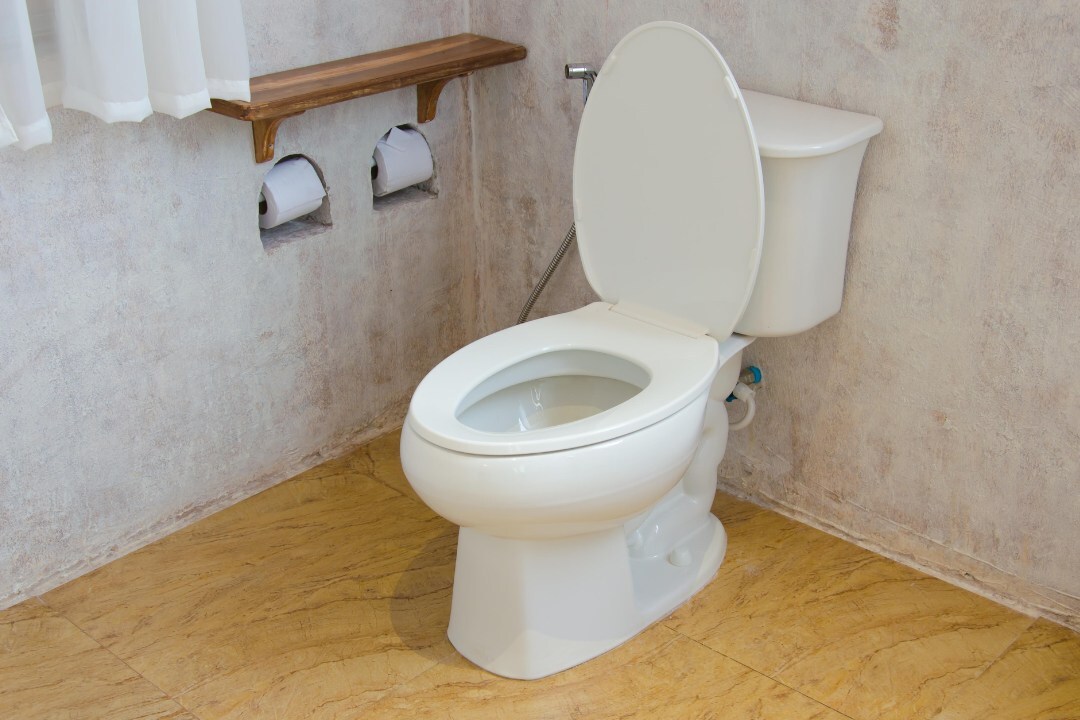
Signs Your Toilet Tank Is Leaking
A leaking toilet tank often gives itself away with small but noticeable changes in sound, smell, or moisture. Recognizing these signs early can help prevent water waste and bathroom damage before the problem gets worse.
1. Constant Running or Hissing
If your toilet keeps refilling after a flush or you hear a faint hissing noise, the tank may be losing water through a worn flapper or faulty fill valve. This constant cycling means water is escaping into the bowl even when the toilet isn’t in use.
2. Water Around the Base of the Toilet
Puddles or damp flooring around the toilet base usually mean the leak is coming from the tank bolts, rubber washers, or the gasket between the tank and bowl. Left unchecked, that water can cause floor damage or mildew buildup.
3. Drop in Tank Water Level
If the water level inside the tank drops without flushing, the issue may be a leak through the flush valve or a small crack in the porcelain. You can test this by adding food coloring to the tank—if color appears in the bowl without flushing, you’ve confirmed a leak.
4. Musty Smell or Water Stains
Persistent odors or discoloration around the toilet indicate that moisture has been sitting for a while. Slow leaks can create the perfect environment for mold and bacteria growth, which only worsens with time.
These symptoms are your early warnings. Finding the exact source of the leak—whether it’s internal or external—will guide the next step in repairing your toilet tank efficiently.
What you need right now
- Towel or rags
- Small bucket or bowl
- Food coloring for a dye test
- Flashlight
Fast triage steps
- Turn the shutoff valve clockwise until it stops.
- Mop up standing water and place a towel behind the toilet.
- Drop 5 to 10 drops of food coloring into the tank and wait 10 minutes.
- If color shows up in the bowl, you likely have a flapper or flush valve seal issue.
- If water appears on the outside of the tank, note the location under the tank center, at the bolts, or at the supply connection.
Keep in mind that tank condensation can look like a leak on humid days. If the tank surface is cold and the room is humid, wipe it dry and watch for fresh beads forming from the top down. A true external leak usually shows at a joint, bolt, or fitting.
According to the American Water Works Association (AWWA), toilets are responsible for approximately 27% of the water used in homes on a daily basis. The amount of water used by toilets is only increased when there is a leak. A leaking toilet tank can result in an incredible loss of water every minute it has not been stopped. It oftentimes goes undetected until a leak test has been conducted.
What Causes a Leaking Toilet Tank? 5 Common Causes
Most toilet tank leaks come down to worn-out parts or loose connections. Each component inside the tank plays a role in maintaining water pressure and sealing the system. When one fails, even slightly, water starts escaping—either into the bowl or onto the floor.
1. Cracked Toilet Tank
Cracks in the porcelain, even small hairline ones, can allow water to seep through over time. Temperature changes or overtightened bolts often cause these fractures. Unfortunately, a cracked tank can’t be repaired permanently and usually needs to be replaced.
2. Worn Flapper Valve
The flapper is the rubber seal at the bottom of the tank that controls water release during a flush. Over time, it can warp, harden, or collect mineral buildup, preventing a proper seal. A leaky flapper allows water to trickle constantly from the tank into the bowl.
3. Faulty Fill Valve
The fill valve refills the tank after each flush and stops when the water level reaches the right height. If it’s damaged or misaligned, the valve may not shut off completely, causing continuous refilling and water waste.
4. Loose Bolts or Corroded Washers
The tank is held to the bowl with bolts and rubber washers that create a watertight seal. If they loosen or corrode, small leaks can form at the base of the tank, showing up as moisture or puddles around the toilet’s foundation.
5. Condensation vs. Actual Leak
Sometimes what looks like a leak is actually condensation forming on the outside of the tank, especially in humid bathrooms. If you notice moisture only on the surface, the issue might not be a plumbing leak at all.
Pinpointing the source of your toilet tank leak is key before replacing any parts. Once you know which component is responsible, the repair process becomes much faster and more effective.
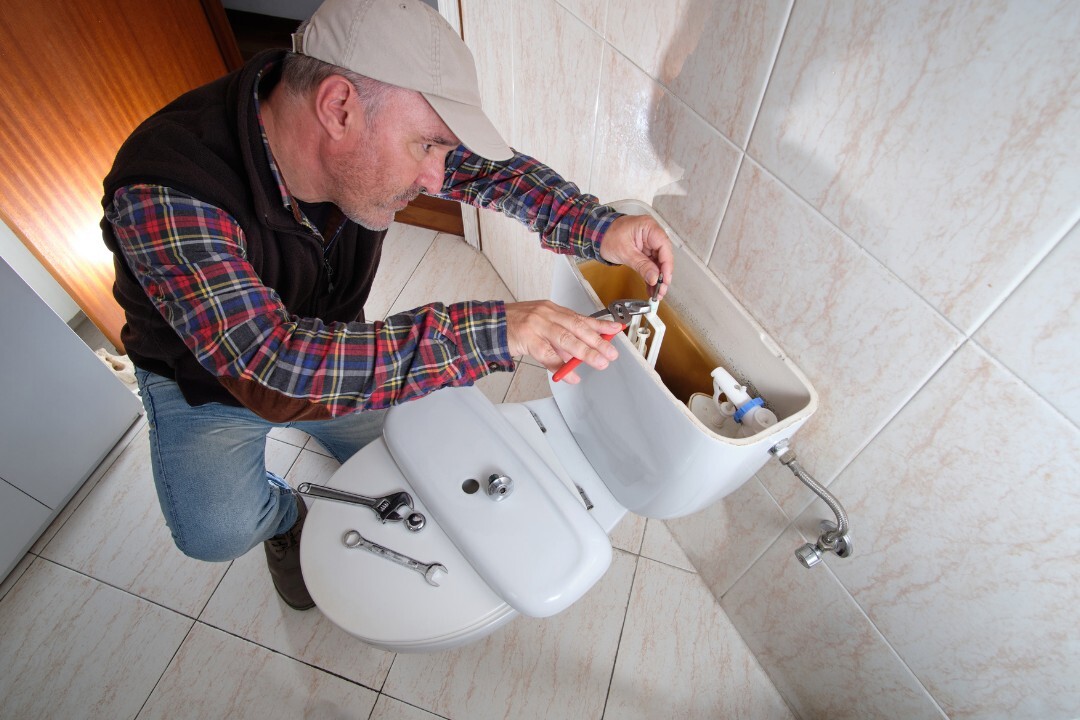
How to Fix a Leaking Toilet Tank
Once you’ve identified the source of the leak, repairing a toilet tank is usually straightforward. Many leaks can be fixed with basic tools and a few replacement parts from your local hardware store. Follow these steps to stop water waste and get your toilet running properly again.
Step 1: Turn Off the Water Supply
Locate the shut-off valve behind the toilet and turn it clockwise to stop the water flow. Flush the toilet once to empty the tank and soak up any remaining water with a sponge or towel.
Step 2: Inspect and Replace the Flapper
Lift the tank lid and check the flapper at the bottom. If it’s warped, cracked, or covered in mineral buildup, replace it with a new one of the same size. A fresh flapper often solves slow leaks between the tank and bowl.
Step 3: Adjust or Replace the Fill Valve
Check that the fill valve shuts off once the tank reaches the proper water level. If it continues to run, adjust the float height or swap out the valve completely. New fill valves are inexpensive and easy to install with an adjustable wrench.
Step 4: Tighten Tank Bolts and Check Washers
Loose tank bolts or worn washers can cause small leaks where the tank meets the bowl. Tighten each bolt evenly, being careful not to overtighten, which could crack the porcelain. If the washers look brittle, replace them with new rubber ones.
Step 5: Replace the Flush Valve or Gasket if Needed
If leaks persist after replacing the flapper and fill valve, the flush valve or tank gasket might be the problem. These parts sit under the tank and require removing it from the bowl. Follow the manufacturer’s instructions carefully or contact a plumber for help with this step.
After completing your repairs, turn the water supply back on and let the tank refill. Keep an eye out for any drips or running sounds over the next few hours to confirm the leak is fully resolved.
Best Sealant for a Leaking Toilet Tank
If water is leaking from your toilet tank, the best sealant depends on where the leak is actually coming from. In a lot of cases, homeowners reach for caulk or plumber’s putty first, but those products usually are not the right fix for a leaking tank.
For leaks around the tank bolts or the tank-to-bowl connection, replacing the rubber gaskets and washers is usually the correct repair. Rubber parts inside the tank break down over time from constant water exposure and cleaning chemicals. Adding sealant over a worn gasket normally only hides the issue temporarily.
If there is a hairline crack in the porcelain tank itself, a waterproof epoxy designed for porcelain or ceramic plumbing fixtures is usually the best option. Two-part epoxy products bond directly to the ceramic surface and create a hard waterproof seal once cured. The area needs to be fully dry before applying it, or the repair usually fails.
Silicone sealant can work around the base of fittings or small exterior seepage points, especially if the leak is minor and not under pressure. A 100% waterproof bathroom-grade silicone holds up better in damp conditions than basic household caulk.
One thing to keep in mind is that a leaking toilet tank often points to aging internal hardware. If the tank bolts are corroded, the gasket is flattened, or the porcelain has a larger crack, replacing the affected parts or the toilet itself is usually the smarter long-term move instead of relying on sealant alone.
Average Cost to Repair a Leaking Toilet Tank
The average cost to repair a leaking toilet tank usually falls between $75 and $350, depending on what is causing the leak and how extensive the repair is. Smaller fixes, like replacing a flapper, fill valve, or tank bolts, are typically on the lower end of the price range because the parts themselves are inexpensive and the repair can often be completed fairly quickly.
If the leak is coming from the tank-to-bowl gasket, homeowners usually spend a bit more because the tank often needs to be removed and reinstalled properly. Labor costs tend to make up most of the bill on these types of repairs.
Cracked toilet tanks are a different story. Small hairline cracks can sometimes be repaired with plumbing epoxy, but larger cracks often mean the tank or the entire toilet needs replacement. In those situations, costs can climb well beyond a simple repair, especially if a new toilet installation is involved.
Emergency plumbing calls, water damage cleanup, and hidden leaks that have already affected flooring or drywall can also push costs higher. A slow drip may not seem serious at first, but over time it can lead to warped flooring, mold growth, or higher water bills if it is left alone too long.
When to Call a Plumber
While many toilet tank leaks can be handled with simple repairs, some problems require professional help. A plumber can diagnose hidden damage, replace structural parts, and ensure your system is watertight and code-compliant.
Cracks in the Porcelain Tank
If you spot a visible crack or hairline fracture, replacement is usually the only option. Once a porcelain tank is compromised, patching won’t hold up under pressure and can lead to water damage or flooding over time.
Persistent or Recurrent Leaks
When you’ve already replaced common parts like the flapper or fill valve and the leak returns, it often signals a deeper plumbing issue. A professional can inspect the tank-to-bowl connection, water supply line, or internal seals that are hard to reach without the right tools.
Water Damage or Mold Around the Toilet
If water has seeped into your flooring, subfloor, or walls, it’s best to call a licensed plumber. Moisture that sits too long can cause mold growth and structural weakening, both of which can become expensive to repair if ignored.
Unusual Noises or Continuous Refilling
Hissing, gurgling, or the sound of a toilet running nonstop could point to an internal valve failure or trapped air in the plumbing system. A plumber can identify the exact cause and replace worn components before they fail completely.
Professional service not only fixes the immediate problem but also helps prevent future leaks. When in doubt, bringing in a plumber ensures your toilet operates safely, efficiently, and without costly surprises later on.
Preventing Future Toilet Tank Leaks
Once your toilet tank is fixed, a few maintenance habits can help keep it that way. Regular checks and gentle cleaning go a long way in preventing leaks and extending the life of your plumbing parts.
Perform Routine Inspections
Every few months, lift the tank lid and look for signs of wear on the flapper, fill valve, and gasket. Listen for any hissing or dripping sounds that might signal a slow leak. Catching small issues early helps avoid costly repairs later.
Avoid Harsh Chemical Cleaners
Drop-in bleach tablets or strong chemical cleaners can corrode rubber seals and cause the flapper to degrade faster. Instead, use mild toilet bowl cleaners and wipe down the tank interior with a soft cloth and vinegar solution when needed.
Replace Old Parts Before They Fail
Rubber components naturally break down over time. Replacing the flapper and washers every year or two keeps the system sealing tightly and prevents unnoticed leaks from developing.
Control Bathroom Humidity
Excess moisture can cause condensation on the outside of the tank, making it look like a leak. Using a fan or dehumidifier keeps humidity in check and protects both your toilet and bathroom surfaces.
Consistent maintenance ensures your toilet stays efficient, saves water, and avoids unnecessary wear on the plumbing system. Spending a few minutes checking these parts each season can prevent larger problems down the line.
Frequently Asked Questions About Leaking Toilet Tanks
If the leak continues after replacing the flapper, the problem may be a damaged flush valve, worn gasket, or misaligned fill valve. Check for cracks in the overflow tube or mineral buildup that prevents a proper seal.
While a small leak isn’t immediately harmful, it can lead to water waste, floor damage, and mold growth if ignored. Persistent leaks can also weaken the flooring around the toilet over time.
A slow leak can waste more than 200 gallons of water per day, depending on the severity of the problem. Fixing worn flappers or faulty valves quickly helps conserve water and lower utility costs.
Yes. In humid environments, condensation can form on the outside of the tank and drip onto the floor, mimicking a leak. If the tank surface feels cool and damp but the water level stays steady, it’s likely just condensation.